Backdrop walls are labeled expensive for several reasons:
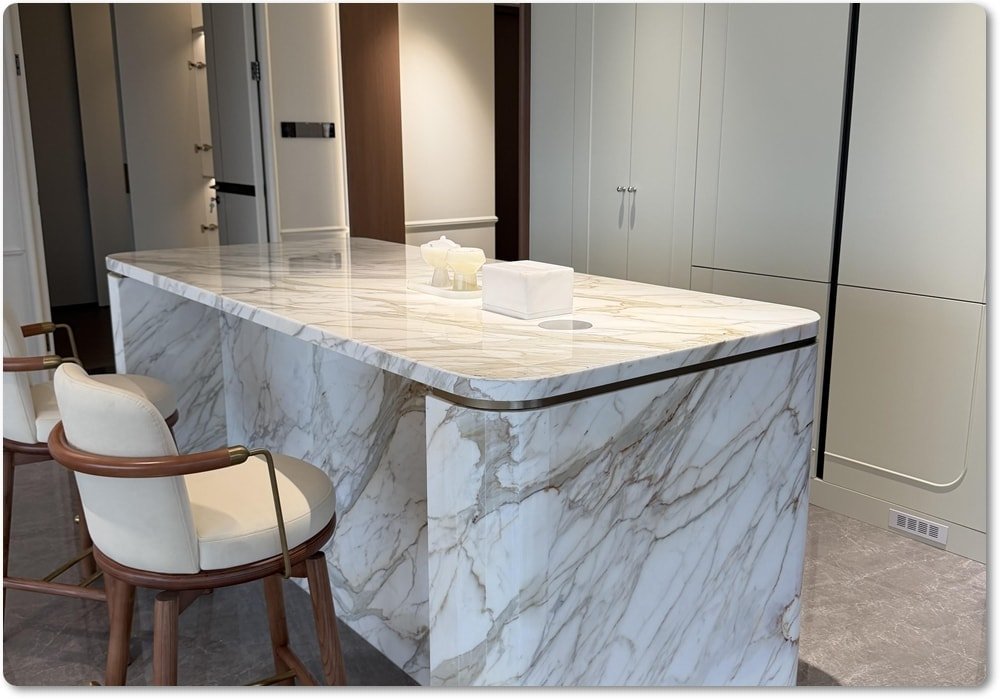
Material cost: One of the commonly used materials for background walls is marble. Marble is a high-quality natural stone with a unique texture and luster, so the price is higher. The high cost of mining, processing, and transporting marble has also led to an increase in the price of backdrop walls.
Complex process: The production of background walls requires multiple processes, including cutting, grinding, splicing, etc. Especially for natural stones such as marble, need to be finely processed to show their beautiful texture and texture. These complex processes require a high level of technology and specialized equipment, which increases the cost of making backdrop walls.
Design & Customization: Backdrops are often part of home décor, and there is a growing demand for home décor. In order to meet the individual needs of consumers, the design and customization of background walls have also become an important service. Designers need to design according to the customer’s requirements and work with the manufacturer for custom production, which also increases the price of the background wall.
Brand premium: Some well-known brands have established a good reputation and brand image in the backdrop market. Consumers have a high level of recognition and trust in the products of these brands, so they are willing to pay a higher price for their products. The brand premium is also one of the reasons why backdrop walls are labeled as expensive.
In summary, the expensive labeling of background walls is the result of a combination of factors such as material cost, complex workmanship, design and customization, and brand premium. Of course, it is most important for consumers to choose a backdrop that suits their needs and budget.
Detailed installation process of marble background wall:
The production process of marble background walls is no different from ordinary plate processing and special-shaped processing, and it pays more attention to splicing and assembly, as well as the cutting of parts, bonding, closing, and other processes.
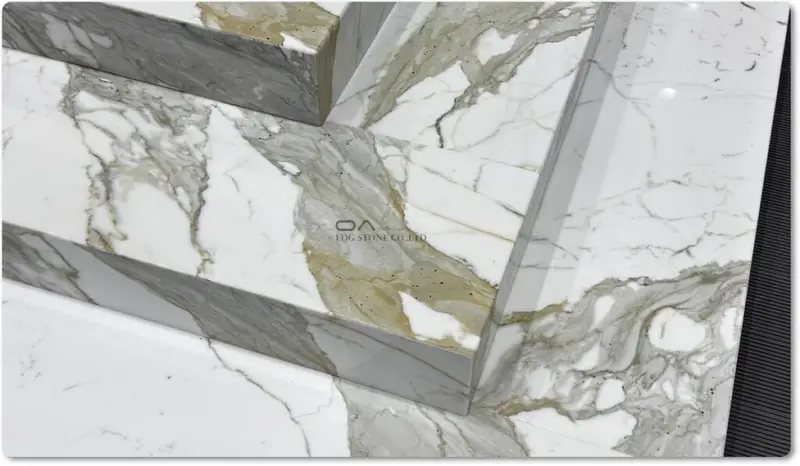
The shape of the marble background wall column is quite many, and the shape of each column is composed of a plurality of accessories, because the style model of each accessory is different, and its production process is not the same. As the saying goes, “The layman looks at the lively, the insider looks at the doorway, and the peer looks at the process”, the same stone background, the appearance of the shape is almost the same, and the size of the area is the same, and even the color and texture of the stone are almost the same, but the price can be tens of thousands of differences.
After reading it, you will know that the basic production process can be roughly divided into design demolition→ material selection, flower arc carving→ rough grinding→ fine grinding→ fine grinding→ polishing repair→ original design drawings, trial spelling→ inspection packaging.
01. Plate selection
02. CAD drawing. According to the style and size required by the customer to make a design drawing, and then the overall marble background wall column of each component is split, according to the regular size of the drawing.
03. Cutting. The selected materials are cut with mechanical equipment according to the size of the CAD dismantling drawing, so as to arrange the evolution of the next process.
04. Engraving part. The marble background wall column accessories need to be carved with an engraving machine for patterns and grooves, etc., which can be processed in an orderly manner according to the pattern carving required by customers.
05. Kibble. Roughly polish the periphery and some chamfered positions of the cut stone fittings, and edge some excess uneven places
06. Fine grinding and fine grinding, the surface of the stone and the places that have been cut and polished are treated, so as to highlight the texture of the stone, add the luster effect of the stone carvings, and improve its artistic appeal, these two processes can be carried out at the same time.
07. Polishing and repairing. The surface and chamfer of the accessories of the overall marble background wall column are polished to increase the overall gloss, and there are some places that need to be repaired and then polished.
08. Stitching of the column body, try to spell
After all the accessories of the entire marble background wall column are processed, the original drawings are spliced to see if there are imperfections that need to be processed, and the whole marble background wall column is completed in time.
09. The packaging is inspected and completed
Try to spell the real picture sent to the customer to confirm that it can be packaged and shipped, a single piece of accessories is packaged separately, and the overall packaging is packed in a wooden box, which has a shockproof, anti-collision, anti-collision protective film.
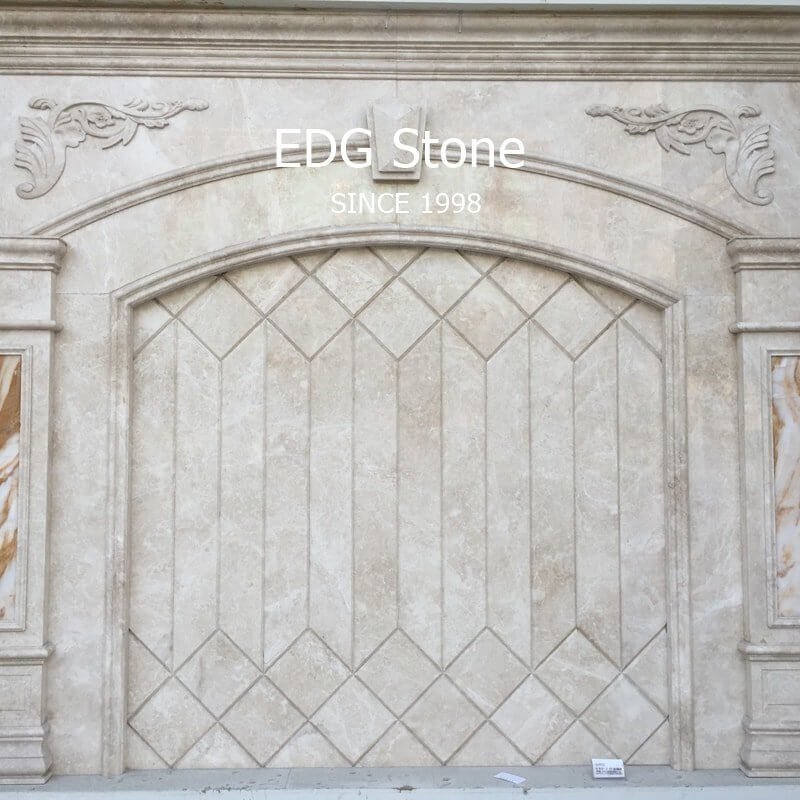
After reading the basic production process of the overall marble background wall column, I understand that you are naturally expensive. Marble is a background wall, but also has the functions of sound absorption, sound insulation, wave absorption, etc., the key is versatile, and any style can be easily held, because of this, its position in the decoration is becoming more and more important.

Analysis of the production process of marble background wall columns:
01. Machining of stigma
From Figure 1, we can see that the vertical height of the column head is 110mm, but when you want to process the top corner line of the column head, you must not produce it according to the width of 110mm, which must be noted when splitting the drawing, the dismantling artist habitually writes 110 wide on the cutting list, taking the top corner line of the background wall in Figure 1 as an example, its width is 140mm,
(1) the production of the gong head: as shown in Figure 2: the order of the gong head of the top angle line must be placed horizontally (the place where the corner of the dotted line part is also counted), and the opposite direction of the shape is customized, according to the different equipment, the size of the gong head is generally 200x 60 (Yongda line machine), 200x 50 (bridge cutting machine or single cutting machine), 200x 45 (Yongda line machine), 200x 45 (Tenglong single-head edging machine).
At the same time, it is necessary to customize the corresponding shape of the resin polishing wheel, fiber polishing wheel, and forming sand strip. The left and right sides of the resin polishing wheel and fiber polishing wheel are to polish the lines directly on the machine, and the function of forming the sand bar is to use the hardness of its own emery and the softness of the resin (fiber) to repair the resin wheel and fiber wheel into the shape we need.
(2) Stone cutting: the cutting of marble is different from the cutting of artificial stone, because the material of marble is more brittle and hard than artificial stone, and it is easy to produce chipping edges and corners, and the marble saw blade is only about 3mm (the saw blade of artificial stone is slightly thicker, about 4~5mm), and the bridge cutting machine operator should also pay attention to the thickness of the saw blade at this time, otherwise the width of the cut product will deviate.
In addition, natural marble is different from artificial stone, the shape of the mine is not a regular quadrangle, and there will be irregular edges in the plate after row sawing, so the first knife must be smoothed out of the irregular edge, which is why the loss of natural stone will be greater than that of artificial stone.
In addition, it should be noted that no matter how large or miscellaneous the size of the top corner line (line) of the background wall, the long strip must be cut out before processing.
(3) forming, polishing, chamfering: when the raw materials are cut, after the gong wheel is customized, you can go on the machine modeling, the processing of the top angle line is no different from the processing method of the ordinary line, but when the top angle line is formed, the two sides of the semi-finished product do not need to be polished, because it is cut off after the edge is chammed.
The next step is the chamfer, which needs to bond a “U” frame (bonded with stone waste), the “U” frame must ensure that after the semi-finished product is put on, the vertical distance from the highest point to the lowest point is 100mm (the distance varies according to different corner line shapes) so that the processed products are very standard,
(4) chamfering: the chamfer of the top angle line is different from the two-dimensional chamfer of the ordinary line or plate, it belongs to the three-dimensional chamfer, in addition to the line and the machine at a 45 ° angle, the line itself must also be placed vertically, the process flow is:

(1) Positioning (nail the wooden block on the machine and trim the edge with a saw blade to ensure that the cutting of the line is 90°)
(2) Slitting (segmented cutting according to the required size),
(3) positioning (cutting the positioning strip, ensuring that the trimming edge of the positioning strip is horizontal, and the frame 45 needs to be used. positioning),
(4) Check whether the frame and the positioning strip are 45. , the vertical height of the line, as shown in Figure 2 vertical 110mm height),
(5) Trimming by the frame (find the cutting point after trimming, consistent with the longest point of the line, to prevent the line from becoming shorter due to the chamfering corner),
(6) Inspection and positioning (check the vertical height of the top angle line, if different, the best way is to calculate, so that the reinforced part and the slotted part are not on a vertical line, dislocated with each other so that the risk of slotting through will be much smaller, and it is not easy to break),
(7) Cutting
(8) Cut another piece of pairing (after cutting the first piece, ‘cut the second piece in the opposite direction, note that it must be in the opposite direction, otherwise it is the same to cut out, there is no way to splice it into 90 degrees, in fact, the two things that are paired can be cut at the same time),
(9) Try to spell (after cutting one piece, then follow the same method, pair to cut another piece, and then try to spell in pairs),
02. Processing of column necks
The pre-processing of the column neckline is the same as the column head corner line, and it will not be repeated, but the way of cutting the angle is not as complicated as the top angle line, which belongs to the two-dimensional cutting angle, and it only needs to stand up the line to ensure the height of the column neckline (here it is 50mm high) and 45.
03. Machining of the column
The column body is relatively simple, according to the example in Figure 1, only need to groove on the plate surface, it should be noted that the conventional M thickness of natural stone – generally will not exceed 18mm (of course, there are also 20mm ‘belong to the unconventional), and the back of each column board needs to be reinforced to prevent breakage, the depth of the rib groove is generally about 8mm (the size of the stiffener – generally 3X6 flat iron or fiber strip, or 6mm diameter carbon fiber rod), so if it is 17mm board surface’ Subtract the 8mm deep rib groove on the back, the remaining thickness is only 8mm, so the depth of the Roman groove can not exceed 8mm, of course, the best way is to calculate, so that the reinforced part and the grooved part are not on a vertical line, dislocated with each other, so that the risk of slotting through will be much smaller, and it is not easy to break, in addition, the side plate of the column body also needs to be polished, because there is a dislocation with the French side of the column body, and it is protruding 3mm.
04. Machining of column bases
Take Figure 1 as an example, the overall thickness of the column base is 30mm, but in general, natural stone basically does not take this practice, one is a waste of material, and the other is that the 30mm plate is all wool board, there is no shape where to polish, the conventional practice in Figure 1 is 80mm wide modeling and flat plate for combination is more economical and reasonable.
(1) Cutting the board. According to the material of the order to cut out the 80mm wide thick plate and 220mm wide plate, the specifications can not be cut according to the size in the figure, calculate the total number of meters required plus part of the allowance can be added and then add the allowance and tool path loss, the reason why the whole processing, on the one hand, the surface line into a dough – will not be deformed because of too many sections, on the other hand, when the back is 45 ° can be consistent.
(2) Thick plate modeling and polishing. The 80mm wide line thick plate on the line machine modeling, the root shed paper, the side of the line actually needs to throw one (thin edge) can be, the other side (thick edge) is bonded with the plate, does not need to be light, need to pay attention to processing, can not do useless work.
(3) Bonding. When the line is formed and polished, it is necessary to bond the line to the side panel, and it is necessary to pay attention to the gap during bonding.
(4) Subparagraph. The 1500mm long column baseline is divided into 430mm, 430mm, 122mm, 122mm, 122mm, 122mm, and 122mm respectively according to the diagram.
(5) Back to 45 degrees. Different from the flat plate, when the back is down, it depends on the unevenness of the machine table, which needs to be taken on the back to make it on the horizontal plane, which can be padded with sawdust or 10mm high waste stones.
(Note: The right side of the line can be placed without triangular sawdust or waste stone pieces, because the left side has been paddled 10mm high, and the center of gravity after horizontal placement is on the board instead of the line, so it can be placed smoothly.) After placing it horizontally, the single-cutter head tilt function is used to tilt 45° to form it together.
In many processing methods the lines and the flat plate are processed separately after the line is formed, the segmentation ‘cut the corners according to the column neck processing method, and the flat plate is also reversed, and then bonded separately, this method is also desirable, but the processing process has one more “line cutting corner” process, and the separate processing may lead to the dislocation of the line and the flat plate is inconsistent, not all 10mm dislocation,
05. Machining of the head plate
For the second type, it is easy to assemble and the efficiency is high, but for the high-demand home decoration is not up to the owner’s standard, but for fast-moving goods, the second type is definitely the best choice, if it is to do high-quality products, the first kind will bring a more strong European feeling and sense of hierarchy.

If the second bonding method is adopted, you only need to put the line type on the bottom plate first, and then use a pencil to draw the outline of the line along the edge of the line that you try to put together, and then polish the part that the line bar needs to touch, pay attention to the bottom plate can not be polished when grinding.
If the first way is adopted, it is relatively troublesome, put the line type on the bottom plate to try to spell, determine the outer wheel gallery of the line, and then use the cutting machine or the waterjet or the Yin carving machine to hollow out the part of the central part, and then paste the line, the digging plate and the remaining material of the digging plate, and the center plate after bonding is trapped, considering the center of gravity of the force, the outer frame plate is equivalent to being suspended.
Therefore, the suspended part must be fixed with artificial stone or granite, and one side is broken, especially natural stone, and even broken into several sections in the hollowing process (when the style of the column body is not to pull the Roman groove but to use wireframe accessories, this method can also be used)