Quick Summary:
Quick Summary: Large-format quartzite slabs—available as full-thickness or thin-slab panels—are a premium option for creating near-seamless shower walls. This guide covers material selection, thin-slab support strategies, waterproofing integration, seam-minimizing layout techniques, installation workflow, cost signals, maintenance, and the procurement checklist developers and architects need for reliable project delivery.
Introduction — executive snapshot
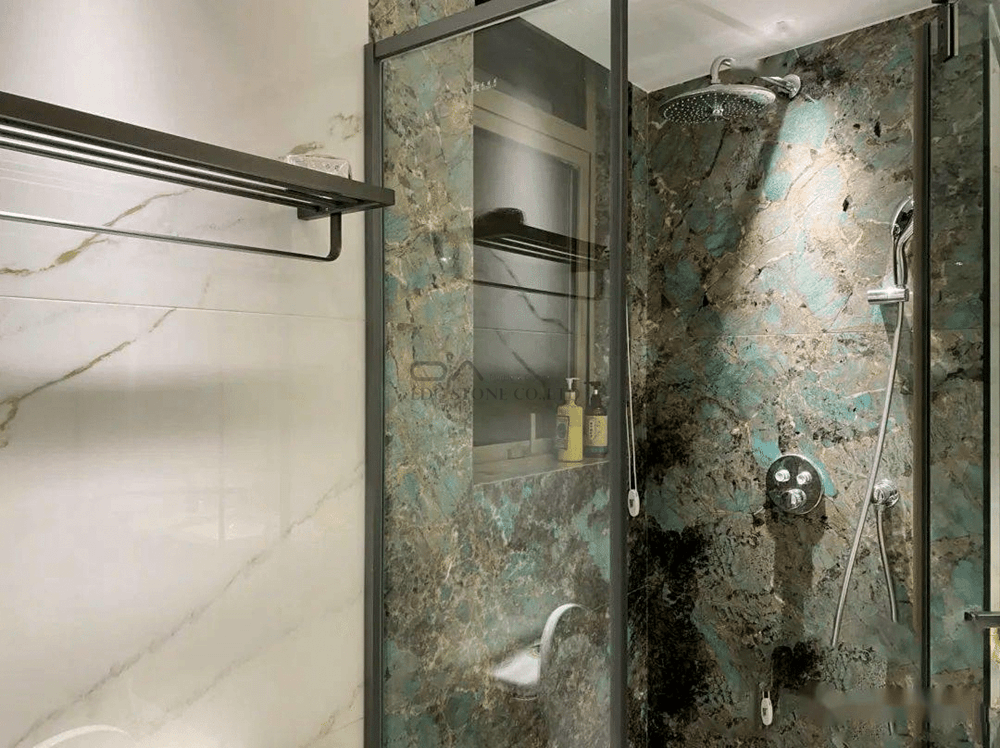
Quartzite shower walls deliver the drama of natural stone with real-world durability for wet environments. When executed with large slabs or modern thin-panel systems, quartzite can produce a continuous, bookmatched, or flowing-vein aesthetic with minimized seams—ideal for luxury bathrooms, boutique hotels, or high-end multifamily units. This article explains how to choose the right quartzite product, plan layouts to minimize seams, specify substrates and waterproofing, select compatible adhesives and seam treatments, and manage procurement so your finished shower wall is both beautiful and robust.
— — —
Why quartzite for shower walls? Material fundamentals & pros/cons
What is quartzite, and how does it differ from similar stones?
Quartzite is a metamorphic rock formed when sandstone is subjected to heat and pressure, fusing quartz grains into a hard, interlocking crystalline structure. Unlike marble (which is calcitic and vulnerable to acid etching) or typical granites (igneous rocks with different mineral mixes), quartzite often offers the hardness and scratch resistance of quartz-rich stone while retaining distinctive veining and natural variation.
Mineralogy & appearance
Quartzite typically shows translucent quartz grains that can sparkle in polished finishes, plus vein patterns and color veils from accessory minerals. Colors range from near-white and silver to warm creams, beiges, and deeper grays. The visual depth and natural veining make quartzite attractive for full-height shower walls where continuous patterns can be displayed.
Pros & cons for wet vertical applications
Pros: high hardness and abrasion resistance, excellent thermal stability, visually striking large-format bookmatching, and good long-term wear.
Cons: variable porosity between quarries (requiring sealing), heavy weight for full-thickness slabs, and higher material/fabrication cost than porcelain tile in many markets. Thin-slab systems mitigate weight but require engineered support and compatible adhesives.
— — —
Product options & sizing: large slab vs thin slab
Standard slabs and large-format selections
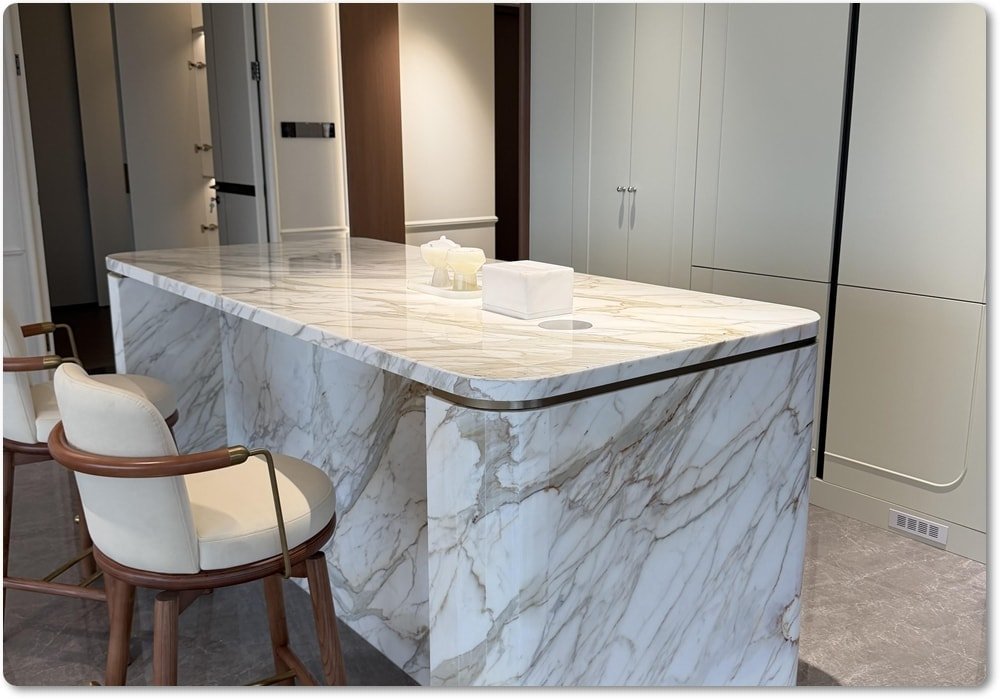
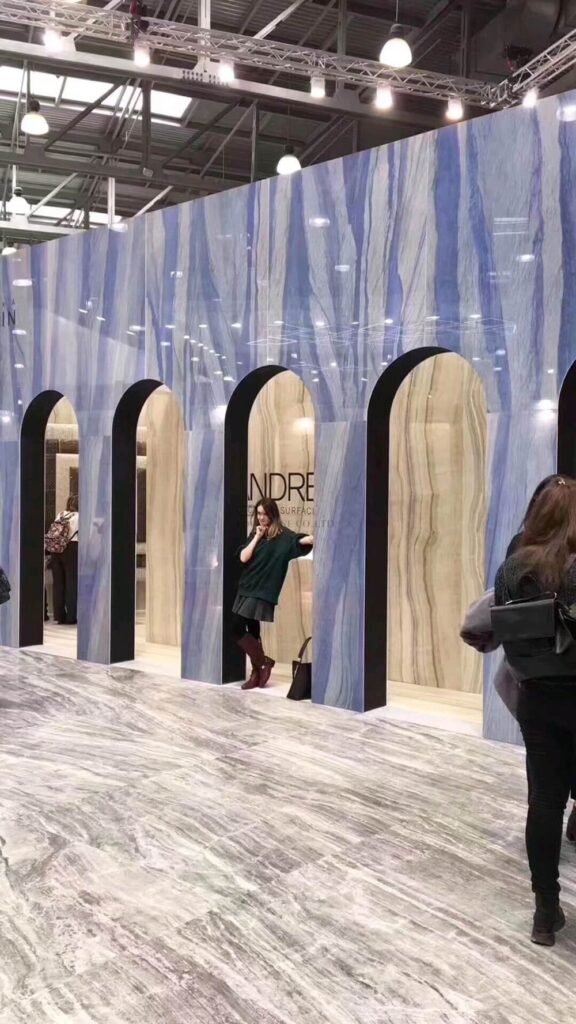
Large-format quartzite slabs—commonly fabricated in widths of up to 120–140 inches (depending on quarry and manufacturing)—allow designers to span entire walls with a small number of seams. For seamless visual results, specify bookmatched pairs or continuous-vein slabs and confirm slab length/height in procurement.
Thin slabs: benefits and structural needs
Thin quartzite panels (6–12 mm) reduce weight and shipping costs and are compatible with mechanically supported wall systems. Because thin slabs are less massive, they require a stiff substrate (cement backer board over framed structure, or engineered metal backing) and adhesives rated for vertical thin-stone panels. Thin panels are ideal where wall framing cannot support full 20–30mm slabs without reinforcement.
How to specify to avoid substitution?
Always require a quarry/product code and an approved physical slab sample (or full-size digital slab image) with the batch number. For projects that pride themselves on visual continuity, request a “slab set” reservation from the supplier so all slabs for a bathroom run come from the same extraction lot.
— — —
Design strategies for a seamless appearance
Layout planning: bookmatching and vein alignment
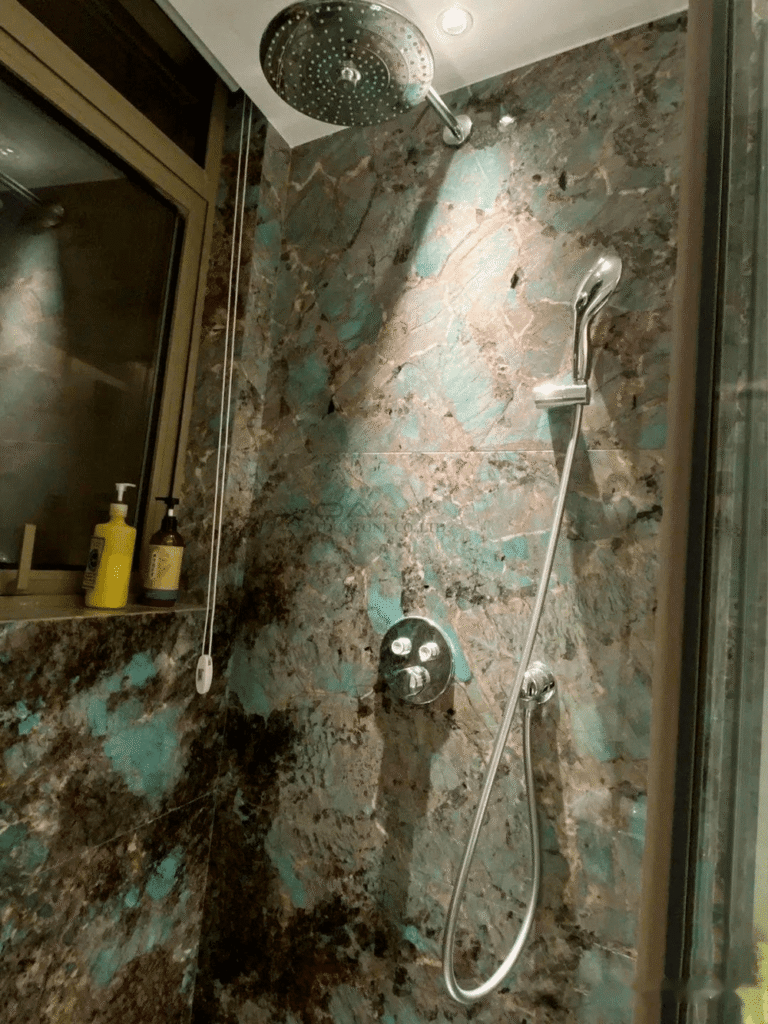
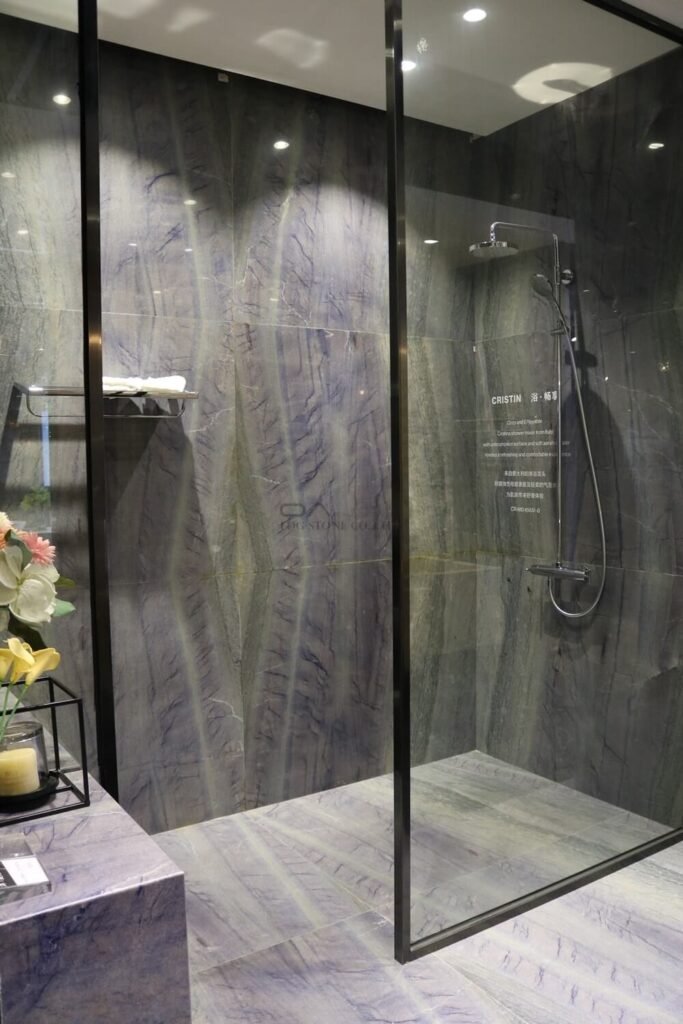
Bookmatching pairs two adjacent slabs so veins mirror each other—this creates a dramatic, continuous flow. For full-height showers, plan vein directions vertically and create mockups showing where seams will fall relative to the shower head, glass panels, and niches.
Visual planning templates
Use CAD elevations with overlaid slab photos to get client sign-off before fabrication. Indicate seam tolerance, vein alignment priority, and whether visual continuity takes precedence over optimal structural seam placement.
Minimizing visible seams
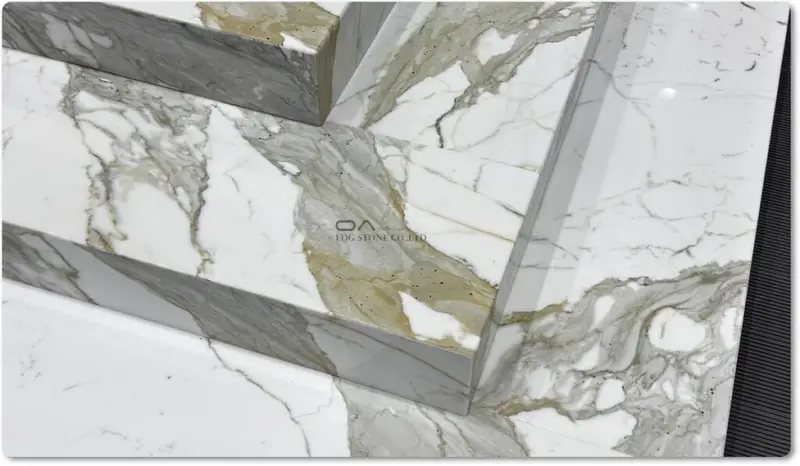
Place seams in low-visibility areas when possible (behind glass or along corners). Match seam filler color to dominant veining and keep seams tight with factory-polished edging and low-shrink epoxy or color-matched resin.
— — —
Fabrication & edge detailing
Edge profiles and integrated niches
Common edge profiles for shower walls are square or eased; heavy ogee or complex profiles are infrequent because they complicate waterproofing transitions. Consider prefabricated niches and shelves that are cut from the same slab to maintain vein continuity.
Prefab vs on-site finishing
Prefabricating elements—such as bench tops, sills, or niche liners—in the shop ensures precise polished edges and reduces on-site handling risks. On-site finishing may be required for final adjustments and to polish seams after installation if access allows.
Waterproofing interface & detailing
Stone panels must integrate with the shower’s waterproofing system: a continuous waterproof membrane must terminate behind the stone at strategic points, and the stone installation should allow for back buttering and drainage behind panels where applicable to prevent trapped moisture.
— — —

Structural & substrate considerations
Choosing compatible substrates
Thin quartzite panels perform best when bonded to a rigid substrate: cementitious backer boards, fiber-cement panels, or specialized reinforced metal-stud systems. For heavy 20–30 mm slabs, ensure the wall framing and blocking are engineered to carry point loads and wind or seismic forces if relevant.
Anchoring and support channels
Large vertical panels often use a combination of adhesive bonding and mechanical fasteners (hidden clips or channels) at the top and bottom. Use stainless-steel channels fixed to blocking that distribute weight to structural framing rather than solely to adhesive.
Thermal and movement tolerances
Allow movement joints where stone meets dissimilar materials (glass, metal, tile). Plan for expansion gaps and specify flexible, waterproof joint materials to prevent stress cracking due to thermal cycling.
— — —
Waterproofing & integration with shower systems
Approved waterproofing systems & installation order
Follow project code and manufacturer guidance for waterproof membranes (liquid-applied or sheet membranes) and ensure the membrane is continuous up to the edge of the stone substrate. The typical sequence: substrate → waterproof membrane → set bedding/adhesive → stone panel.
Sealing strategies for quartzite
Use penetrating sealers certified for natural stone. For shower walls, select sealers with proven resistance to repeated wet/dry cycles and specify re-seal intervals (commonly 12–36 months depending on the product and water chemistry). Document sealing in maintenance manuals for property managers.
Integrating drains, pans, and glass panels
Coordinate stone layout with drain and pan locations so seams do not cross critical waterproofing interfaces. Glass-to-stone interfaces should use continuous channels or structural glass mounts that compress into waterproof gaskets rather than direct rigid contact.
— — —
Adhesives, mortars & seam bonding
Recommended adhesive types
Use high-performance, vertical-rated natural-stone adhesives or modified thinset mortars specified for large-format natural stone. Adhesives should have proven tensile and shear strengths for the planned stone thickness and substrate type.
Seam filler and invisible seams techniques
For the smallest visual seam, use low-shrink epoxy or color-matched two-part resin. When seams must be structural, consider resin-infused seams where resin is used both as a cosmetic and structural agent; these require precise fabrication and experienced installers.
— — —
Installation workflow & quality control
Typical installation sequence
Dry-fit panels and confirm vein alignment.
Remove panels and prepare substrate, apply waterproof membrane.
Back-butter panels and set with adhesive; use support channels/clips as required.
Fill seams and perform final polishing/cleaning.
Apply penetrating sealer and document batch IDs/photos for warranty.
On-site handling and safety
Large panels need mechanical hoists and certified rigging. Train crews in handling thin slabs to avoid breakage and use vacuum-lift equipment when possible. Record slab photos and batch numbers upon arrival for traceability.
Acceptance checklist
Confirm slab batch, finish, thickness tolerance, seam quality, waterproof integration, and applied sealant. Record any deviations and corrective action plans before final sign-off.
— — —
Costs & pricing signals
Material and installation cost drivers
Quartzite price varies by rarity, finish, and quarry. Full-thickness premium slabs and bookmatched sets command higher unit costs, while thin panels lower shipping and handling but increase labor and support-system costs. Factor in fabrication complexity (niches, integrated benches) and specialized adhesives.
Estimating for projects
For budgeting, create per-sq-ft material + fabrication + installation estimates and include contingency for slab waste (commonly 10–20% for bookmatching) and protective shipping crates. For larger projects, negotiate manufacturer or factory wholesale pricing and slab reservations.
— — —
Maintenance, durability & lifecycle
Routine cleaning & re-sealing
Recommend pH-neutral cleaners and avoid acidic cleaners that can dull or etch some accessory minerals. Document a reseal schedule (e.g., test annually and reseal every 12–36 months depending on water exposure and product).
Repair procedures
Minor chips can be filled with color-matched resin; cracked seams may need partial removal and re-bonding. Keep an inventory of spare slab remnants for color matching during repairs.
— — —
Code, standards & regulatory guidance
Which standards to reference
Require stone performance testing and acceptance criteria, and reference recognized standards and industry organizations during specification: ASTM International, the U.S. Green Building Council guidance for sustainable disclosures, and the Natural Stone Institute for best practices. For tile and setting system expectations, involve the National Tile Contractors Association (NTCA) or a similar organization to ensure adhesive and waterproofing compatibility. National Tile Contractors Association
Testing will be required from suppliers
Ask suppliers for absorption values, flexural strength, and documented finish durability. Request manufacturer installation instructions and recommended waterproofing detailing notes as part of the contract package.
— — —
Case studies & real installations
High-end residential bookmatched shower
A single full-height, bookmatched quartzite wall creates a continuous visual axis from floor to ceiling. Prefabricated niche liners and bench pieces cut from the same slab preserved vein continuity and reduced site adjustments.
Multifamily thin-panel retrofit
A retrofit project used 6–8 mm quartzite panels over reinforced cement backer boards to replace dated ceramic tiles. Because thin panels reduced dead weight, the installer completed multiple units quickly with less disruption to plumbing and framing.
— — —
Supplier & procurement playbook
How to source
Work with a manufacturer or distributor who can reserve slabs and provide slab photos and batch guarantees. For volume runs, request pricing tiers for slab batch reservations and fabrication throughput guarantees.
Required procurement documents
Ask for: slab batch photos, test certificates (absorption/flexural), installation instructions, recommended adhesives/sealants, and field-approval sample panels.
— — —
Frequently Asked Questions — Google-style
Q1: Can quartzite be used for shower walls?
A1: Yes. Quartzite is suitable for shower walls when properly selected and installed: choose slabs with appropriate porosity characteristics, integrate a full waterproofing system behind the stone, and follow the manufacturer’s sealing and adhesive recommendations. With correct detailing, quartzite offers durable, long-lasting vertical surfaces.
Q2: Are thin quartzite slabs safe for vertical shower applications?
A2: Thin quartzite slabs (6–12 mm) can be used if bonded to a rigid, reinforced substrate and supported by mechanical channels or clips. They require adhesives and installation methods rated for thin-stone panels and proper handling to avoid breakage.
Q3: How do you achieve near-seamless quartzite shower walls?
A3: Use large-format slabs and plan bookmatching and vein alignment during design. Place seams where least visible, employ low-shrink seam resins or color-matched epoxies, and ensure tight factory-polished edges for minimal seam width.
Q4: What are typical costs for quartzite shower walls?
A4: Costs vary widely by slab rarity, finish, fabrication complexity, and region. Expect material and fabrication to be substantially higher than standard ceramic tile; thin-slab systems reduce shipping costs but can increase labor. For accurate budgeting, request manufacturer quotes and account for waste and special handling.
Q5: How should quartzite shower walls be maintained?
A5: Clean with pH-neutral cleaners and avoid acids. Apply penetrating sealer at installation and test annually to determine reseal intervals (typically 12–36 months). Keep spare slab remnants for color-matched repairs.
— — —
Semantic Close: How ● Why ● What ● Options ● Considerations
How — Implementation in five steps: 1) Select slab sets and reserve batches; 2) confirm substrate engineering for thin or full slabs; 3) dry-fit for vein alignment; 4) apply continuous waterproofing; 5) set panels with backing channels + adhesive, fill seams, seal, and document.
Why — Value proposition: Quartzite provides natural, high-end aesthetics with excellent long-term hardness and thermal stability that outperform many tile options in perceived luxury and durability.
What — Deliverables to request from suppliers: slab photos with batch numbers, test certificates (absorption/flexural), installation details, recommended adhesives and sealants, and a factory-cut sample panel for sign-off.
Options — Alternatives & tradeoffs: large-format porcelain offers near-zero porosity and uniformity (but different aesthetic); engineered quartz provides color consistency but less translucency and natural veining. Choose based on priority: uniformity vs natural character.
Considerations — Risk register: quarry variability, handling breakage for thin slabs, sealed vs unsealed warranty language, and waterproofing termination liability. Mitigate with batch locking, sealed acceptance testing, and clear installation responsibility clauses.
— — —
References (author/article/source — no links)
ASTM International — “C97 Standard Test Methods for Absorption and Bulk Specific Gravity of Dimension Stone” — ASTM standards organization.
ASTM International — “C170 Standard Test Method for Compressive Strength of Dimension Stone” — ASTM standards organization.
U.S. Green Building Council — “LEED Reference and Material Disclosure Guidance” — USGBC guidance.
National Tile Contractors Association — “Tile & Stone Installation Manuals and Waterproofing Recommendations” — NTCA technical guidance.
Tile Council of North America — “Large Format Thin Panels: Standards and Best Practices” — TCNA technical notes.
Technical paper — “Thin Stone Veneer Support Systems for Vertical Applications” — industry engineering summary.
— — —