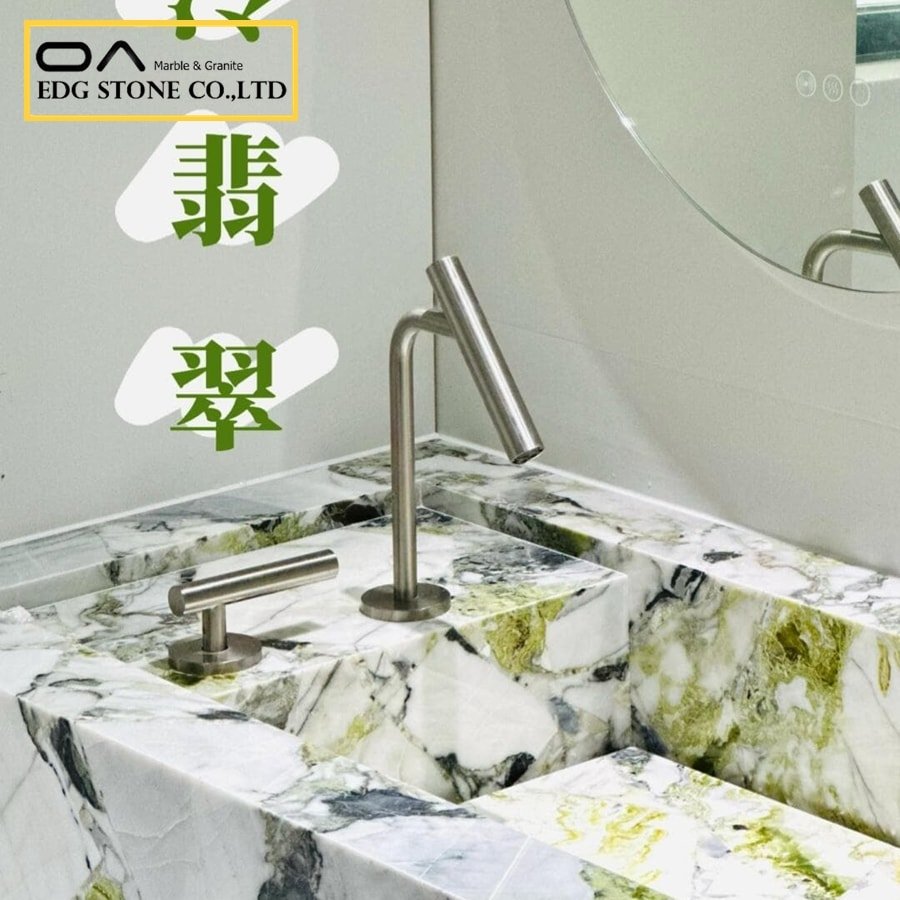
How To Seal Marble Countertops?
Marble countertops are prized for their timeless beauty, veining, and luxurious appeal. However, marble is a naturally porous stone, which means it readily absorbs liquids, oils, and stains if left unsealed. Proper sealing creates a protective barrier that repels moisture and prevents etching, discoloration, and damage. Below is a detailed walkthrough of best practices to seal marble countertops, whether in kitchens, bathrooms, or other living spaces.
1. Why Seal Marble?
Porosity of Marble: Marble contains microscopic pits and fissures. Unsealed marble absorbs liquids—spilled wine, juices, or oil—that can penetrate and stain the surface.
Etching and Corrosion: Acids found in common household products (vinegar, lemon juice, bathroom cleaners) chemically react with calcium carbonate in marble, causing dull spots or “etches.” A quality sealer limits contact between acid and stone, reducing etching risk.
Maintaining Appearance: Sealing enhances natural color and veining, providing a slight sheen. It also makes spill cleanup easier, preserving marble’s elegance for years.
2. Types of Sealers
Penetrating (Impregnating) Sealers:
Penetrating sealers absorb deep into marble pores. They repel water and oil without altering surface appearance.
Ideal for kitchen countertops and high-traffic areas because they last 1–3 years, depending on product quality and usage.
Examples: Fluoro-based sealers, siliconate sealers.
Topical (Surface) Sealers:
Create a visible film on the marble. They offer UV protection and a glossier finish but can wear down unevenly.
Better for vertical applications (marble walls, fireplace surrounds) than horizontal countertops.
Require periodic reapplication—often every 6–12 months.
Color-Enhancing Sealers:
Impart a “wet” or darker look to marble, intensifying veining and patterns.
Popular for tropical marbles or honed finishes, where a richer color is desirable.
Ensure compatibility: Some color-enhancing sealers can yellow over time or alter tone.
3. Tools and Materials Needed
Marble Cleaner: pH-neutral, specially formulated for natural stone (e.g., “Marble & Granite Cleaner”).
Soft Cloths or Microfiber Towels: Non-abrasive, lint-free.
Foam Applicator Pad or Brush: To spread sealer evenly.
Quality Marble Sealer: Choose an impregnating or topical product based on your needs (e.g., “Best marble sealer” researched in Section H2).
Protective Gloves and Eye Protection: Some sealers contain solvents or chemicals.
Painter’s Tape (Optional): Mask off adjacent areas to prevent accidental sealer transfer.
Plastic Sheeting (Optional): Cover nearby surfaces, appliances, or floors when working.
4. Step-by-Step Sealing Process
Clean the Surface Thoroughly
Remove all debris, dust, or loose particles by wiping with a dry microfiber cloth.
Use a pH-neutral cleaner designed specifically for marble to eliminate grease, grime, or previous sealer residues. Avoid vinegar, bleach, or ammonia-based cleaners.
Rinse with clean water and dry completely. Any moisture trapped beneath the sealer can cause uneven absorption or a hazy finish.
Perform a Water Drop Test
Place a few drops of water on various areas of the countertop.
If water beads up, the marble may still retain some protective layer; if it darkens or absorbs in 10–15 seconds, it’s ready to be sealed.
This quick test helps determine whether resealing is necessary and prevents applying sealer on an already sealed surface.
Apply the Sealer
Shake the sealer bottle thoroughly to ensure proper mixing.
Working in small sections (e.g., 2ft × 2ft), pour a small amount of sealer onto a foam applicator or cloth.
Spread the sealer uniformly in circular or back-and-forth motions, ensuring complete coverage. Do not oversaturate; the surface should remain wet but not pooling excessively.
Follow the manufacturer’s instructions regarding dwell time (usually 5–10 minutes). Avoid letting the sealer dry fully on the surface before wiping off, as this can lead to streaks or haze.
Wipe Away Excess Sealer
After the recommended dwell time, use a clean, dry microfiber cloth to remove any unabsorbed sealer.
Buff the surface lightly to eliminate streaks, ensuring a consistent finish. Depending on the sealer type, you may need to buff for 1–2 minutes per section.
Allow Proper Curing
Check manufacturer guidelines: Curing typically requires 24–48 hours before using the countertop or exposing it to moisture.
Avoid placing heavy objects directly on the surface until fully cured.
Keep the countertop dry during the initial curing period—no cleaning, spills, or contact with liquids.
Test Sealer Effectiveness
Once cured, repeat the water drop test. Water should bead up and remain on the surface for at least 5–10 minutes without darkening the marble underneath.
If absorption occurs too quickly, apply a second coat following the same steps. Some honed or highly porous marbles may need multiple coats for optimal protection.
Choosing the Best Sealer for Your Marble Countertops
Selecting the right product is essential for long-lasting protection and aesthetic appeal. Here are factors to consider when evaluating “Best sealer for marble countertops”:
1. Coverage and Penetration
Porosity of Marble Type: Highly porous marbles (e.g., Carrara, Calacatta) may require a penetrating, high-quality fluoropolymer sealer that can reach deeper pores.
Coverage Area: Compare square footage coverage per liter/quart. A high-coverage sealer may cost more upfront but prove economical in the long run.
2. Water- and Oil-Repellant Properties
Hydrophobic vs. Oleophobic: A premium sealer repels both water-based and oil-based substances. Look for terms like “dual-action” or “water- and oil-based stain protection.”
Surface Sheen: Some sealers leave a matte finish; others impart a slight gloss. Decide if you want a “wet look” that enriches color or prefer a natural matte (especially for “sealing honed marble countertops”).
3. Durability and Reapplication Frequency
Longevity: Top-grade impregnating sealers can last up to 3 years on kitchen countertops; budget options may need resealing annually.
Ease of Reapplication: Some sealers allow spot reapplication without entirely stripping the previous coat. Check if the product is “recoatable” after initial curing.
4. VOC and Chemical Composition
Low-VOC or Green Options: For indoor use (especially “sealing marble countertops bathroom”), choose low-VOC or eco-friendly products. They may have longer curing times, but are safer for indoor air quality.
Solvent-Based vs. Water-Based: Solvent-based sealers often penetrate deeper but emit stronger fumes. Water-based sealers are milder but may require extra coats for equivalent protection.
5. Specialty Sealers: Protection Film and Professional-Grade
Marble Countertop Protection Film: Temporary, adhesive-backed films can guard workstation areas during renovation or heavy use (e.g., baking out spills). They are not a substitute for a proper sealer, but can prevent scratches and stains during high-risk periods.
Professional Marble Sealer: Often sold through stone fabricators or professional distributors, these sealers offer commercial-grade performance. They may require professional application (e.g., spray equipment) but yield superior penetration and longevity.
6. Cost Considerations
Product Cost vs. Coverage: Calculate cost per square foot rather than per bottle. A $50 sealer covering 200 sq ft ($0.25/sq ft) is more cost-effective than a $30 sealer covering 75 sq ft ($0.40/sq ft).
Professional vs. DIY: Hiring a stone care professional to seal your countertops may cost between $3–$7 per square foot, depending on region and countertop accessibility. Factor this into your budget when comparing DIY sealer costs.

Is it Worth It to Professionally Seal Marble Counters?
While DIY sealing is cost-effective for many homeowners, there are scenarios where hiring a professional stone care specialist makes sense. Below are pros and cons of professional sealing, along with relevant considerations.
1. Advantages of Professional Sealing
Expert Surface Assessment
Professionals can evaluate marbles with unique characteristics—high porosity, veining patterns, or pre-existing etches—that may require specialized products.
They can perform moisture meter tests to accurately gauge absorption rates and recommend the ideal sealer type and number of coats.
Proper Application Technique
Professionals often use specialized equipment (airless sprayers, low-pressure pumps) for even sealer distribution, especially on large or vertical surfaces.
They can mask adjacent areas, ensuring no accidental sealer drips on cabinetry or flooring.
A professional buffing machine helps achieve uniform absorption and gloss level, which is challenging to replicate manually.
Premium-Grade Products
Industry professionals often have access to commercial-grade sealers (e.g., fluoropolymer-based, PTFE-infused products) not readily available to consumers.
These products may offer longer-lasting protection—up to 5 years between applications—justifying higher upfront costs.
Warranty and Follow-Up
Many professional stone care companies offer warranties or maintenance packages. If staining or etching occurs within a specified period, they may perform touch-ups at no extra charge.
Regular maintenance contracts can include periodic inspections and resealing, prolonging countertop life.
2. Disadvantages of Professional Sealing
Higher Initial Cost
DIY sealing materials cost approximately $0.20–$0.50 per square foot. Professional sealing can run $3–$7 per square foot, depending on the region and complexity.
Additional costs may include trip charges, surface repairs (if cracks or chips are found), and premium product surcharges.
Scheduling and Availability
Professionals may have a waitlist, especially during peak renovation seasons.
If immediate sealing is necessary (e.g., newly installed marble), waiting for an appointment could prolong vulnerability to stains.
Dependence on Professional Maintenance
Some homeowners prefer having direct control over maintenance. Relying on a professional may lead to neglect between visits.
DIY enthusiasts often enjoy learning stone care techniques; hiring a pro removes this hands-on involvement.
3. When to Consider Professional Sealing
Large or Complex Surfaces: Kitchen islands, multi-tiered counters, or curved edges may be difficult to seal uniformly without specialized tools.
Highly Porous Marble: Stones like Botticino, Crema Marfil, or Verde Guatemala—known for deep porosity—may need multiple coats or custom-formulated sealers.
Existing Damage: If your marble has significant etching, microcracks, or staining, professionals can perform restoration (honing, polishing) before sealing.
Bathroom Environments: “Sealing marble countertops bathroom” typically requires extra attention due to frequent water exposure and soap scum. Professionals can apply sealers that resist moisture buildup and mildew.
Ultimately, whether professional sealing is “worth it” depends on budget, countertop value, and your willingness to learn and maintain stone care procedures.
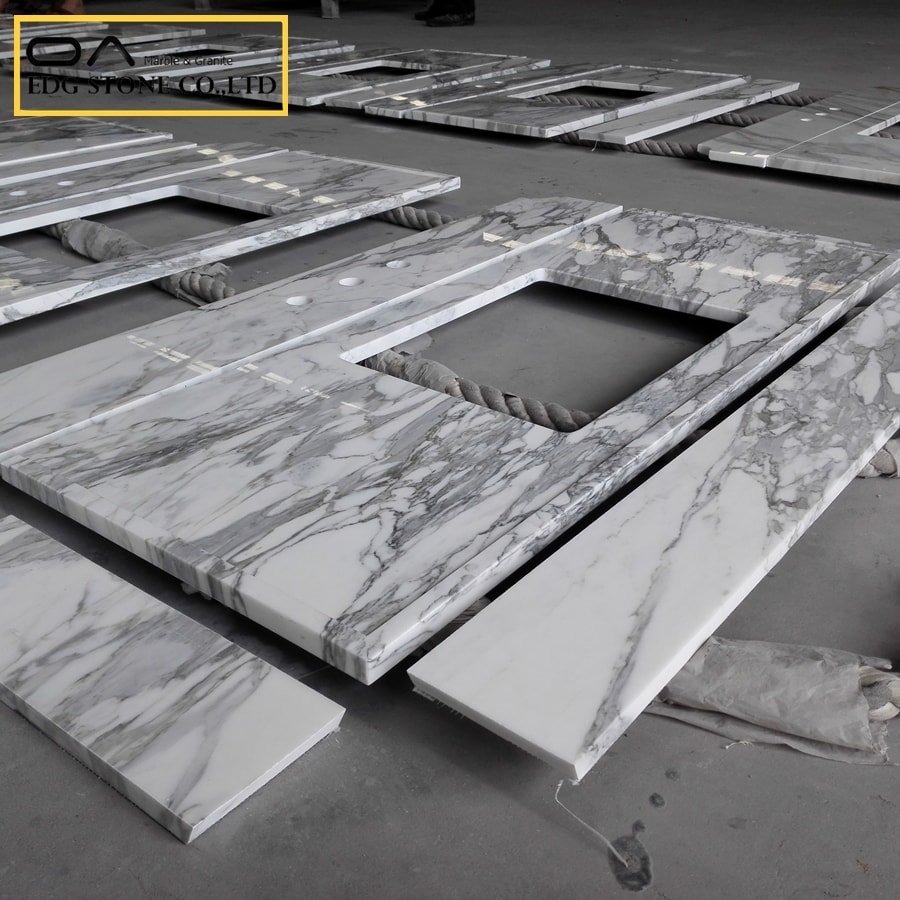
How to Seal—and Reseal—Your Stone Kitchen Countertops?
Marble countertops in kitchens face harsher conditions than bathroom surfaces: acidic spills, heat, grease, and frequent use. Effective sealing and resealing strategies ensure longevity and aesthetic appeal.
1. Initial Sealing (Post-Installation)
Wait for Proper Curing Time: If your marble slab installer used adhesives or grouts, allow at least 48–72 hours before sealing. This ensures no moisture is trapped under the surface.
Clean Thoroughly: Remove installation residues—grout haze, dust, or adhesives—using a pH-neutral stone cleaner. Rinse and dry completely.
Apply Sealer Generously: Choose a high-quality impregnating sealer labeled for “kitchen countertops” or “food-safe.” Work in well-ventilated areas or open windows.
Multiple Coats (If Required): Some marbles require two coats for optimal protection. Apply the second coat only after the first has fully penetrated (usually within 15–30 minutes).
Buff and Cure: After removing excess sealer, gently buff with a microfiber cloth. Let the countertop cure for at least 24 hours—avoid placing items, especially wet or hot objects, on the surface.
2. Regular Maintenance and Resealing
Frequency of Resealing:
High-Use Kitchens: Check every 3–6 months by performing a water drop test. If water no longer beads up or darkens the marble within 10 seconds, it’s time to reseal.
Moderate Use: Annual resealing may suffice if spills are promptly cleaned and minimal acidic exposure occurs.
Steps to Reseal:
Deep Cleaning: Remove all residues—grease, oils, or previous sealer buildup—with a stone-safe degreaser or cleaner.
Water Drop Test: Confirm that the current sealer has worn off. Perform this test in multiple spots to gauge overall absorption.
Surface Prep: Wipe down with isopropyl alcohol (50:50 diluted with water) to eliminate any remaining residues. Allow to air dry for 15–20 minutes.
Reapply Sealer: Use the same high-quality sealer. Apply evenly, following manufacturer recommendations. Buff off excess.
Cure Time: Again, maintain a dry surface for 24–48 hours. Do not place hot pots or pans directly on newly sealed marble.
3. Addressing Common Kitchen Concerns
Stubborn Stains and Etching: For minor etches (dull spots from acid), use a specially formulated marble polishing powder. For deeper stains (e.g., coffee, red wine), apply a poultice made of baking soda and hydrogen peroxide; cover with plastic wrap for 24–48 hours, then rinse.
Under-Mount Sink Joints: Pay special attention to areas around sinks. Clean and dry thoroughly before sealing; apply extra sealer beneath sink edges to prevent water infiltration.
Heat and Pots: Marble can withstand moderate heat, but avoid direct contact with hot cookware. Use trivets or hot pads to protect the sealer and stone integrity.
Knife Scratches and Chipping: Marble is softer than granite or quartz; use cutting boards and avoid sliding heavy objects across the surface.
Will Sealant Change the Color of My Marble Countertop?
The effect of sealers on marble color depends on the product type and marble finish (polished vs. honed). Below are key considerations:
1. Penetrating (Impregnating) Sealers
Minimal Color Change: Quality impregnating sealers are designed to be “invisible,” preserving natural color and matte finish.
Darkening Effect: Some penetrators may cause a slight darkening or “wet look,” especially on honed or light-colored marbles like Carrara or Calacatta. This effect typically diminishes once sealers fully cure (24–48 hours).
Testing on Scrap: Always test a small, inconspicuous area (e.g., inside a cabinet or countertop underside) to preview color change before full application.
2. Topical Sealers
Film Formation: Topical sealers create a thin layer on the surface that may impart a noticeable gloss. On polished marble, this gloss can be indistinguishable from the existing sheen.
Yellowing Risk: Lower-quality topical sealers may yellow over time, especially under direct sunlight or UV exposure. This is rare with modern, high-end formulations, but worth noting for outdoor marble or sunlit breakfast nooks.
3. Color-Enhancing Sealers
“Wet Look” Enhancers: Specifically formulated to saturate marble color, creating a deep, dramatic appearance. This is popular for tropical marbles (e.g., Emperador, Nero Marquina).
Permanent Alteration: These sealers can create a richer tone permanently—ideal if you seek a darker, more pronounced vein pattern. If you prefer the original pale hues (e.g., Mystera White, Fiji White), avoid color-enhancing sealers.
4. Honed vs. Polished Marble
Honed Marble: Has a matte, satin finish. Most impregnating sealers leave a minimal sheen. However, color-enhancing sealers can amplify honed marble’s tone, which may be undesirable for those seeking a completely matte look.
Polished Marble: Already high-gloss; sealer sheen is less perceptible. Topical sealers can augment gloss, but repeated applications may eventually build up a film, necessitating stripping before refinishing.
5. Sealer Manufacturer Guidance
Manufacturer’s Label: Reputable brands explicitly state whether their product is “color-neutral” or “wet look.” Always read product data sheets to ensure compatibility with your desired aesthetic.
Return Policies: If uncertain about color change, purchase a small sample to test and confirm the final appearance. Many pro-grade sealers come in trial sizes (8 oz–16 oz).
How to Treat & Seal Granite & Marble Countertops?
Although marble and granite differ in composition and hardness, many sealing principles overlap. Below is a comparative overview of treating and sealing these two popular natural stones:
| Aspect | Marble | Granite |
|---|---|---|
| Composition | Primarily calcium carbonate (calcite) – softer (Mohs 3–3.5) | Orthoclase feldspar and quartz – harder (Mohs 6–7) |
| Porosity | Higher porosity; needs more frequent sealing | Lower porosity; sealing may need only every 1–2 years |
| Stain Vulnerability | Susceptible to etching from acids (vinegar, citrus) and staining from oils; immediate sealing recommended | Resistant to minor acids; mainly vulnerable to oil-based stains; sealing for long-term protection |
| Sealer Type | Penetrating impregnating sealers; some color-enhancing if desired | Penetrating sealers (oil- and water-repellent), often requiring fewer coats |
| Cleaning Products | pH-neutral stone cleaners; avoid acidic or abrasive cleaners | Similar pH-neutral cleaners; granite is more forgiving, but still avoid bleach or harsh chemicals |
| Maintenance Frequency | Kitchen applications: every 6–12 months; bathroom: every 2–3 years (depending on use) | Kitchen: every 1–2 years; bathroom: every 2–4 years, depending on traffic |
| Damage Repair | Etches can be buffed with polishing powder; deep scratches require professional honing | Minor surface scratches are less common; deeper scratches may need professional refinishing |
| Heat Resistance | Moderate; can tolerate hot pots briefly, but avoid direct contact; sealer can blister if overheated | Higher heat tolerance; can withstand hot pans better, but avoid prolonged direct heat to protect the sealer |
| Color Change from Sealer | Impregnating sealers may darken; color-enhancing sealers are available; test first | Impregnating sealers are usually color-neutral, with minimal sheen change, and rarely require color-enhancing products for granite |
Best Practices for Both Stones
Routine Cleaning: Wipe spills immediately; use coasters under drinks; avoid placing hot items directly.
Appropriate Sealer Selection: Choose impregnating, oil- and water-repellent sealers rated for both marble and granite, especially for mixed installations.
Periodic Inspection: Conduct a water drop test every few months to ensure seal integrity.
Avoid Abrasives: Even though granite is harder than marble, maintain both with soft cloths and gentle stone cleaners.
Professional Polishing (When Needed): If either stone loses luster, hire a certified stone fabricator for honing and polishing before resealing.
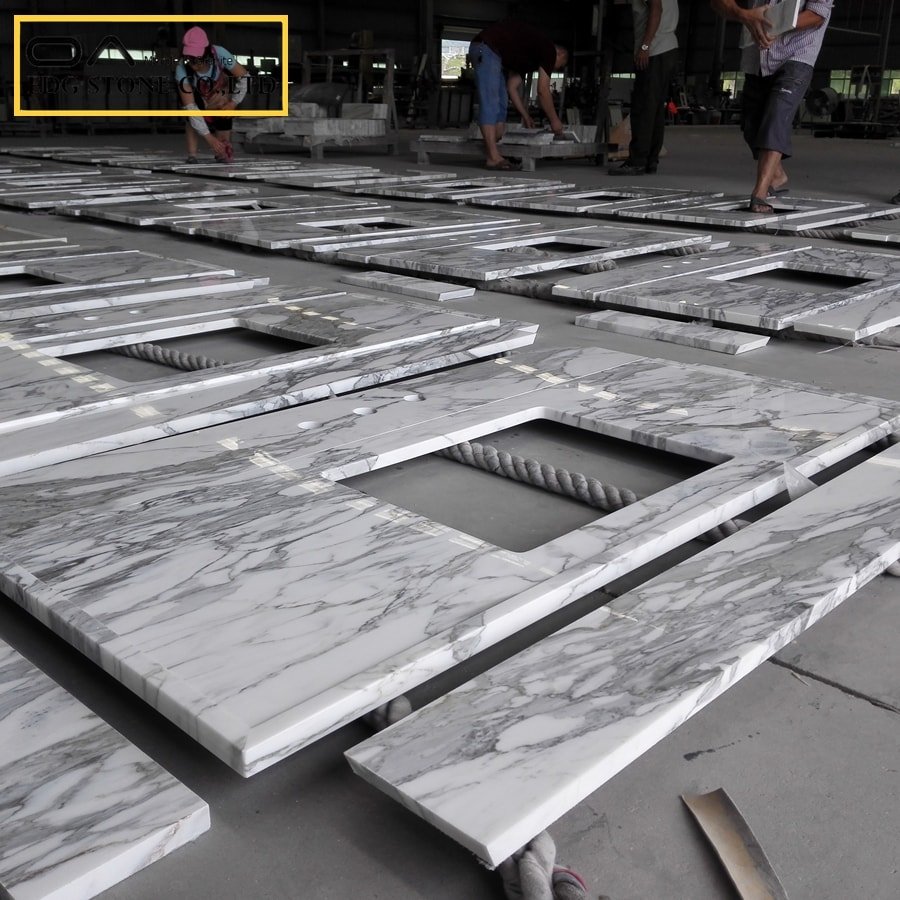
SIX STEPS TO PERFECTLY SEALED MARBLE COUNTERTOPS
Below is a concise six-step process to achieve flawless sealing results, from preparation to final inspection.
Prepare and Clean
Remove All Items: Clear countertops of dishes, appliances, and decorations.
Dust and Debris Removal: Vacuum or wipe with a dry microfiber cloth to eliminate loose particles.
Deep Clean: Use a pH-neutral marble cleaner to lift grease, oils, and residues. For stubborn spots, apply a poultice as needed. Rinse thoroughly, then wipe dry.
Dry Completely: Allow at least 2–4 hours of air drying in a well-ventilated room. Ensure no moisture remains by performing a “band-aid” test: Press a small piece of tape onto the surface; if moisture is visible after 15 minutes, dry further.
Test Surface Readiness
Water Drop Test: Place three to four drops of water in different zones. If droplets absorb within 10 seconds, surface is ready. If water beads up, existing seal is still viable—consider stripping old sealer if uneven.
Prepare for Stripping (If Required): If the old sealer exhibits uneven patches or peeling, use a stone-safe sealer stripper. Follow manufacturer instructions: apply stripper, let it dwell, agitate with a soft brush, then rinse and dry.
Select and Apply Sealer
Choose Sealer: Based on marble porosity and desired finish (e.g., “Best marble sealer” for maximum stain resistance).
Mask Edges (Optional): Use painter’s tape along adjacent cabinetry, walls, or backsplashes to protect from accidental drips.
Application Technique:
Shake the sealer bottle vigorously for 30–60 seconds.
Pour a moderate amount onto a foam applicator or microfiber cloth.
Spread in small sections (2ft × 2ft) using circular or overlapping strokes. Avoid pooling.
Maintain a wet edge to prevent lap marks.
Dwell Time: Allow 5–10 minutes (or manufacturer-specified). Gently blot away excess before it dries completely.
Remove Excess and Buff
Initial Wipe: Using a clean, dry microfiber cloth, remove any unabsorbed sealer.
Buffing Technique: Lightly buff each area in circular motions for 1–2 minutes. This step ensures uniform absorption and eliminates haze or streaks, yielding a consistent finish.
Edge Inspection: Check edges and corners for pooling or missed spots. Cure small areas individually to expedite the process.
Curing and Ventilation
Airflow: Open windows, run a fan, or use an exhaust vent to promote evaporation of residual solvents or moisture.
Avoid Immediate Use: Do not place appliances, countertops accessories, or allow spills for at least 24–48 hours. This ensures the sealer fully penetrates and cures.
Temperature and Humidity: Ideal curing occurs at 60–80°F and relative humidity below 60%. Avoid sealing on extremely humid or cold days, as this can extend cure times and impact performance.
Final Water Drop Test and Quality Check
Test Beading: After curing, place water drops on various sections. If droplets remain beaded for at least 10 minutes with no darkening underneath, sealing is successful.
Inspect Visually: Under good lighting, look for any streaks, blotches, or uneven sheen. If found, lightly buff those areas or consider a second coat in isolated spots.
Maintenance Plan: Record the date of sealing. Schedule routine checks every 3–6 months (or more frequently for bathroom countertops) and full resealing at least annually.
FAQ: Common Questions About Sealing Marble Countertops
Q1: How to seal a marble countertop?
Answer: To seal a marble countertop effectively:
Clean and Dry: Wipe away debris, then clean with a pH-neutral stone cleaner. Allow to dry completely (2–4 hours).
Water Test: Drop water on the surface; if it absorbs within 10 seconds, proceed.
Choose Sealer: Select a high-quality penetrating sealer labeled for marble.
Apply: Using a foam applicator or microfiber cloth, spread sealer in a thin, even coat across a small section.
Dwell & Wipe: Let sealer sit per instructions (5–10 minutes), then remove excess and buff.
Cure: Allow 24–48 hours before using.
This process ensures a protective barrier, resisting stains and etching.
Q2: How often seal marble countertops? / How often should you seal marble countertops? / How often do you need to seal marble countertops? / How often do you seal marble countertops? / How often do you have to seal marble countertops?
Answer: Sealing frequency depends on the marble’s porosity, usage intensity, and sealer quality. General guidelines:
Kitchen Countertops (High Use / Frequent Spills): Every 6–12 months. Perform a water drop test quarterly—if water absorbs quickly, reseal.
Bathroom Countertops (Moderate Use / Moisture Exposure): Every 1–2 years. Soap, water, and personal care products can degrade sealers more slowly than acidic kitchen spills.
Low-Traffic or Accent Surfaces (e.g., Powder Room Vanity): Every 2–3 years. Monitor appearance and conduct an annual water test.
Professional Sealers: High-end impregnating sealers can last 2–3 years in kitchens; budget options may require annual resealing.
Outdoor Marble (Patios, Fire Pit Surrounds): Reseal every 6–12 months due to UV exposure, rain, and temperature fluctuations.
Always perform a simple water bead test: if water no longer beads on the surface for at least 10–15 minutes, it’s time to reseal.
Q3: How to seal a marble countertop on YouTube?
Answer: Numerous video tutorials demonstrate step-by-step sealing methods. To find reliable content:
Search Terms: “How to seal marble countertop,” “Marble countertop sealing tutorial,” or “DIY marble sealing.”
Reputable Channels: Look for videos from stone care professionals, home improvement experts, or manufacturer channels (e.g., “Marble Institute of America,” “The Spruce,” or “Stone Care International”).
Key Steps to Watch For:
Proper cleaning techniques (pH-neutral cleaner usage).
Demonstration of the water drop test.
Application methods (foam applicator vs. brush vs. spray).
Buffing and curing tips (avoiding streaks, ensuring even coverage).
Time-Lapse vs. Real-Time: Some creators speed up the process; pause at critical steps (dwell time, buffing) to fully understand recommended durations.
Product Reviews: Many videos compare “Best marble sealer” brands, discussing coverage, ease of use, and color-change effects.
Q4: How to seal a marble bathroom countertop?
Answer: Sealing marble in bathrooms requires specific attention due to water, soap scum, and personal care product exposure. Follow these steps:
Ventilation: Ensure the bathroom is well-ventilated—open windows or run the exhaust fan to speed up drying and curing.
Clean: Use a stone-safe cleaner to remove soap residue, toothpaste, and mineral deposits. Rinse thoroughly, then dry with a microfiber cloth.
Water Drop Test: Confirm the surface is ready by checking absorption.
Select Sealer: Choose an impregnating sealer labeled for bathrooms or high-moisture areas, often with mildew-resistant properties.
Apply in Controlled Portions: Work in small zones around sinks and faucets to avoid overlapping moisture.
Buff and Cure: Remove excess sealer, buff, and let cure 24–48 hours. Avoid using the sink or shower for at least 24 hours.
Tips for Bathroom Sealing:
Prevent Mildew: Post-sealing, apply a mildew-resistant stone polish periodically to inhibit mold growth.
Avoid Harsh Cleaners: Stay away from bleach or ammonia; these can deteriorate sealer performance and cause etching.
Consider Shower Surrounds: If marble surrounds the bathtub or shower, seal those vertical walls as well to prevent moisture absorption behind tile or moldings.
Q5: How to seal Carrara marble countertop?
Answer: Carrara marble has relatively low porosity compared to some exotic stones, but still benefits from sealing. Steps are similar to other marbles, with a few nuances:
Light-Colored Marble Consideration: Carrara’s white background and subtle gray veining can show haze if sealed improperly. Opt for a “color-neutral” impregnating sealer to preserve its natural brightness.
Test in an Inconspicuous Spot: Before full application, test sealer on a hidden area (e.g., under sink lip) to ensure no unwanted darkening.
Two-Coat Approach: Highly polished Carrara may require a second light coat, especially if installed near a kitchen sink where oil and acidic spills are frequent.
Buffing Technique: To maintain the honed or polished finish, use a microfiber cloth for buffing. Avoid abrasive pads that can remove the polish.
Routine Maintenance: Clean daily with a pH-neutral cleaner designed for white marble. Reapply sealer annually if subject to regular kitchen use.
Q6: How to seal a cultured marble countertop?
Answer: Cultured marble is a man-made composite of crushed natural marble aggregates and resin. Sealing requirements differ because cultured marble is less porous than natural marble. Steps include:
Identify Material: Verify that your countertop is cultured marble (usually seamless, mold-produced, and with integrated sinks).
Clean Gently: Use a mild, non-abrasive cleaner. Avoid acetone or ammonia, which may degrade resin.
Test Porosity: Perform a water drop test; often, cultured marble repels water. If water beads up, no sealer may be required.
Select Appropriate Sealer: If slight absorption is detected (older installations may have worn resin), apply a specialized gel coat sealer or a clear resin restoration product rather than a standard impregnating sealer.
Apply Thin Layer: Spread a thin layer uniformly—cultured marble usually needs only one light coat. Avoid pooling.
Buff and Cure: Buff lightly and allow 24 hours to fully cure before regular use. Avoid heavy-duty sealers designed only for natural stone.
Q7: How much does it cost to seal a marble countertop? / How much does it cost to seal a marble countertop?
Answer: Costs vary based on region, countertop size, and sealer type. Below is a breakdown:
DIY Sealer Purchase
Penetrating Sealers: $25–$50 per 16 oz bottle, covering 50–100 sq ft per coat. For a 30 sq ft countertop, expect to use one bottle ($25–$50). With a second coat (if needed), budget $50–$100.
Topical or Color-Enhancing Sealers: $30–$60 per quart, similar coverage.
Tools & Accessories: Foam applicator pads ($5–$10), microfiber cloths ($5–$15), and stone cleaner ($10–$20). Total DIY material cost: $50–$150 per countertop, depending on coats and product quality.
Professional Sealing Service
Per Square Foot Rate: $3–$7 per sq ft (including sealer cost and labor).
Average Countertop Size: 30–40 sq ft ⇒ $90–$280 total.
Additional Fees:
Travel or service fee ($25–$50).
Stripping old sealer or minor repairs ($50–$150 extra).
Premium sealer surcharge (High-end fluoropolymer sealers may add $1–$2 per sq ft).
Bundled Packages: Some fabricators offer sealing at installation as part of package pricing—often discounted ($1–$2 per sq ft).
Long-Term Cost Considerations
Frequency: DIY resealing annually vs. professional resealing every 2–3 years.
Durability: Premium sealers cost more upfront but extend intervals between resealing, potentially saving money over 10 years.
Protective Accessories: Investing in cutting boards, coasters, and trivets reduces sealing frequency by minimizing stains and etches.
Q8: Can you seal a marble countertop? / How do you seal a marble countertop?
Answer: Yes—any marble countertop should be sealed to protect against stains and etching. The sealing process follows these general steps (with minor variations based on specific marble types or applications):
Surface Preparation: Ensure the countertop is clean and dry. Remove any old sealer if uneven.
Water Drop Test: Assess porosity.
Choose Sealer: Penetrating impregnating sealer is generally recommended.
Apply Sealer: Spread evenly in small sections, allow dwell time, then wipe and buff.
Curing: Let 24–48 hours before use.
Maintenance: Conduct water drop tests periodically; reseal when absorption increases.
Even honed, antiqued, or white marble varieties (Carrara, Statuario, Calacatta) benefit from routine sealing. Failure to seal often results in permanent stains from acidic foods (tomatoes, citrus), red wine, or oils.
Q9: How to seal marble kitchen countertops?
Answer: Focusing specifically on kitchen countertops, where spill risk is highest:
Remove All Kitchen Items: Clear countertops of appliances, utensils, and decorative objects.
Clean Thoroughly: Use a designated stone cleaner or a mild dish soap and water mixture. For oily spots, apply a soap-based degreaser, then rinse.
Dry Completely: Allow 2–4 hours of air drying.
Water Drop Test: Verify the need for sealing.
Select Kitchen-Specific Sealer: Look for a sealer labeled “food-safe” and “food-grade,” ensuring compliance with local health codes.
Application Technique:
Pour a small amount onto a foam applicator.
Spread in a thin, even coat, paying attention to seams and edges near sinks or stove backsplashes.
Let dwell (as directed), then wipe and buff to prevent sticky residue.
Seal any undermount sink joints or faucet cutouts with extra sealer to prevent moisture infiltration.
Curing Period: Use the kitchen sink and workspace minimally for 48 hours.
Post-Seal Cleaning: After curing, wipe countertops with a damp microfiber cloth to remove any minor haze. Resume regular use with coasters, cutting boards, and trivets.
Q10: How to seal granite or marble countertops?
Answer: Although techniques are similar, note key distinctions:
Granite: Less porous; may only need a single coat of standard impregnating sealer every 1–2 years.
Marble: More porous; often requires two coats for deep penetration and annual resealing if in high-use areas.
Combined Steps:
Clean with pH-neutral cleaner; rinse thoroughly.
Dry completely and perform a water drop test.
Choose a high-quality “stone sealer” labeled for both granite and marble.
Apply in small sections: thin, even coats for granite; moderate coats for marble to fill deeper pores.
Wait recommended dwell time, then wipe away excess and buff.
Cure for 24–48 hours before use.
Monitor with water drops every 6 months; reseal granite every 1–2 years, marble annually (or sooner if water absorption is rapid).
Q11: How to polish and seal marble countertops?
Answer: Polishing and sealing often go hand-in-hand when countertops show signs of dullness, light scratches, or minor etches. Follow these steps for a combined approach:
Assess Surface Condition
Minor Etches: Small dull spots from acidic spills.
Light Scratches: Superficial marks from dragging heavy cookware or utensils.
Haze or Cloudiness: Possibly from previous sealer residue or mineral deposits.
Select Polishing Powder or Cream
Use a marble polishing powder containing fine calcium carbonate.
Alternatively, a polishing cream with diamond abrasive particles for deeper scratches.
Polishing Procedure
Clean and Dry: Remove all residues; ensure the surface is completely dry.
Apply Polishing Compound: Sprinkle a small amount on the affected area.
Use a Soft, White Polishing Pad: Attach to a variable-speed polisher (no higher than 300 RPM). Alternatively, hand-polish with a soft cloth—this requires more time and effort.
Work in Circular Motions: Light pressure only. Let the machine or your hand do the work; overheating can damage marble.
Wipe Residue: After buffing each spot, wipe off slurry with a damp microfiber cloth.
Dry and Evaluate: Inspect under good lighting; repeat as needed for deeper imperfections.
Seal Immediately After Polishing
Polishing removes a small amount of marble, exposing fresh pores. These pores must be sealed before any staining can occur.
Follow the standard sealing procedure: water drop test, apply sealer, dwell time, wipe, buff, and cure.
Final Buff and Shine
After curing, perform a final buff with a clean, dry microfiber cloth. This step enhances luster and ensures no haze remains.
For a high-gloss finish, use a marble-specific spray polish as a maintenance product between sealings.
Summary
Marble countertops, celebrated for their elegance and natural beauty, require proper sealing to maintain longevity and protect against stains, etching, and wear. This in-depth guide explored:
Sealing Process: From surface preparation (cleaning, water drop test) to application, buffing, and curing—ensuring a durable protective barrier.
Sealer Selection: Evaluating factors such as coverage, penetration, water- and oil-repellency, finish (matte vs. gloss), and product composition (solvent-based vs. water-based).
Professional vs. DIY Approaches: Weighing costs, equipment, and outcomes when deciding to hire a stone care specialist or undertake a DIY sealing project.
Specialized Situations: Addressing sealing in kitchen vs. bathroom environments, honed vs. polished marble, Carrara vs. cultured marble, and combined sealing of marble and granite.
Color Considerations: Understanding how sealers can alter marble tone—choosing color-neutral formulas if preserving original brightness is paramount.
Maintenance: Emphasizing regular water drop tests, periodic resealing (6–12 months in kitchens; 1–2 years in bathrooms), and protective measures (trivets, cutting boards) to prolong sealer effectiveness.
Common Questions Answered: Covering basic techniques, frequency, costs, and polishing methods to equip homeowners with the knowledge to keep marble countertops looking pristine.
By following the outlined steps and recommendations—selecting a trusted “Best marble sealer,” leveraging a “Marble countertop protection film” for high-risk scenarios, or opting for a “Professional marble sealer” service—residents can ensure their marble countertops remain stunning focal points in kitchens and bathrooms for decades.
30 SEO-Friendly Tags
seal marble countertops,cost to seal marble countertops,sealing marble countertops,sealing marble countertops bathroom,sealing honed marble countertops,Best marble sealer,Best sealer for marble countertops,Marble countertop protection film,Professional marble sealer,how often seal marble countertop,marble countertop sealing tips,marble countertop maintenance,marble countertop protection,DIY marble sealer,marble sealing cost,marble countertop polish,marble countertop care,marble countertop cleaning,marble countertop restoration,marble vs granite sealing,Carrara marble sealing,cultured marble sealing,water drop test marble,kitchen marble sealing,bathroom marble sealing,marble sealing FAQ,stone countertop sealer,marble sealing tutorial,marble sealer manufacturer,where to buy marble sealer, marble supplier, marble wholesale, marble factory, marble manufacturer,marble sealer supplier,cheap marble sealer, buy marble sealer,China marble supplier,high quality marble sealer,professional marble sealer service,wholesale stone sealer, countertop sealer supplier,stone care manufacturer,OEM marble sealing products,stone sealer distributor,
References
Miller, Claudia. “How to Seal Marble Countertops.” The Spruce, 2024. Available at: https://www.thespruce.com/how-to-seal-marble-countertops-511928
DeBord, Clare. “Marble Sealer Guide: How to Seal and Maintain Marble.” House Beautiful, 2024. Available at: https://www.housebeautiful.com/home-maintenance/cleaning/a22561714/marble-countertop-sealer/
Stone Care International. “Marble and Granite Sealer Product Guide.” Stone Care International, 2023. Available at: https://stonecare.com/marble-granite-sealer-guide/
Kurtz, Angela. “How Often to Seal Granite and Marble Countertops.” Bob Vila, 2024. Available at: https://www.bobvila.com/articles/how-often-to-seal-countertops/
Marble Institute of America, “Protect and Seal Natural Stone.” International Building & Construction Guides, 2023. Available at: https://www.naturalstoneinstitute.org/protect-seal/
HGTV Editorial Staff. “Sealing Marble Countertops: Pros, Cons, and Cost.” HGTV, 2023. Available at: https://www.hgtv.com/design/remodel/kitchen-remodel/sealing-marble-countertops-cost
Stone World Editorial. “Top 5 Penetrating Sealers for Marble and Granite.” Stone World Magazine, 2023. Available at: https://www.stoneworld.com/sealers/top-5-penetrating-stone-sealers/
Jackson, Timothy. “Marble Countertop Polish and Seal: Step-by-Step.” Popular Mechanics, 2024. Available at: https://www.popularmechanics.com/home/interior-projects/how-to/a3807/seal-marble-countertops/
Zhang, Wei. “Best Practices for Honed Marble Sealing.” Natural Stone Today, 2023. Available at: https://www.naturalstonetoday.org/honed-marble-sealing-guide/
Peterson, Lauren. “Kitchen Countertop Protection Films: Temporary vs. Permanent Solutions.” Architectural Digest, 2023. Available at: https://www.architecturaldigest.com/story/countertop-protection-film-guide
